
How to plan a lesson in 6 steps with ClickView

We are passionate about increasing student engagement in the classroom, from creative, exciting lesson plans for early years to challenging, thought-provoking lesson plans for senior students. Here we show you how our lesson plans are designed to meet professional teaching standards and address the needs of our learners so that you have a solid platform for creating your own engaging lessons.
1. Start with a Lesson Objective
Consider each lesson as a step leading towards your overall assessment. Each step will teach the students a skill and deepen their understanding of a topic that will enable them to complete the assessment.
For example, if your assessment item is to write an essay, the steps leading up to the assessment would be:
- Learn essay structure with examples
- How to write an introduction, body and conclusion of an essay
- How to accurately address the essay question
- Practice attempts at writing an essay
- Final assessment
You can access ready-made lesson plans for all primary and secondary grades and subjects on our Teaching Resource page. If we open the “Science Key Stage 3 – Part 1 Lesson Plan Book,” on page 8, you can see the first lesson plan beginning with the objective as follows:
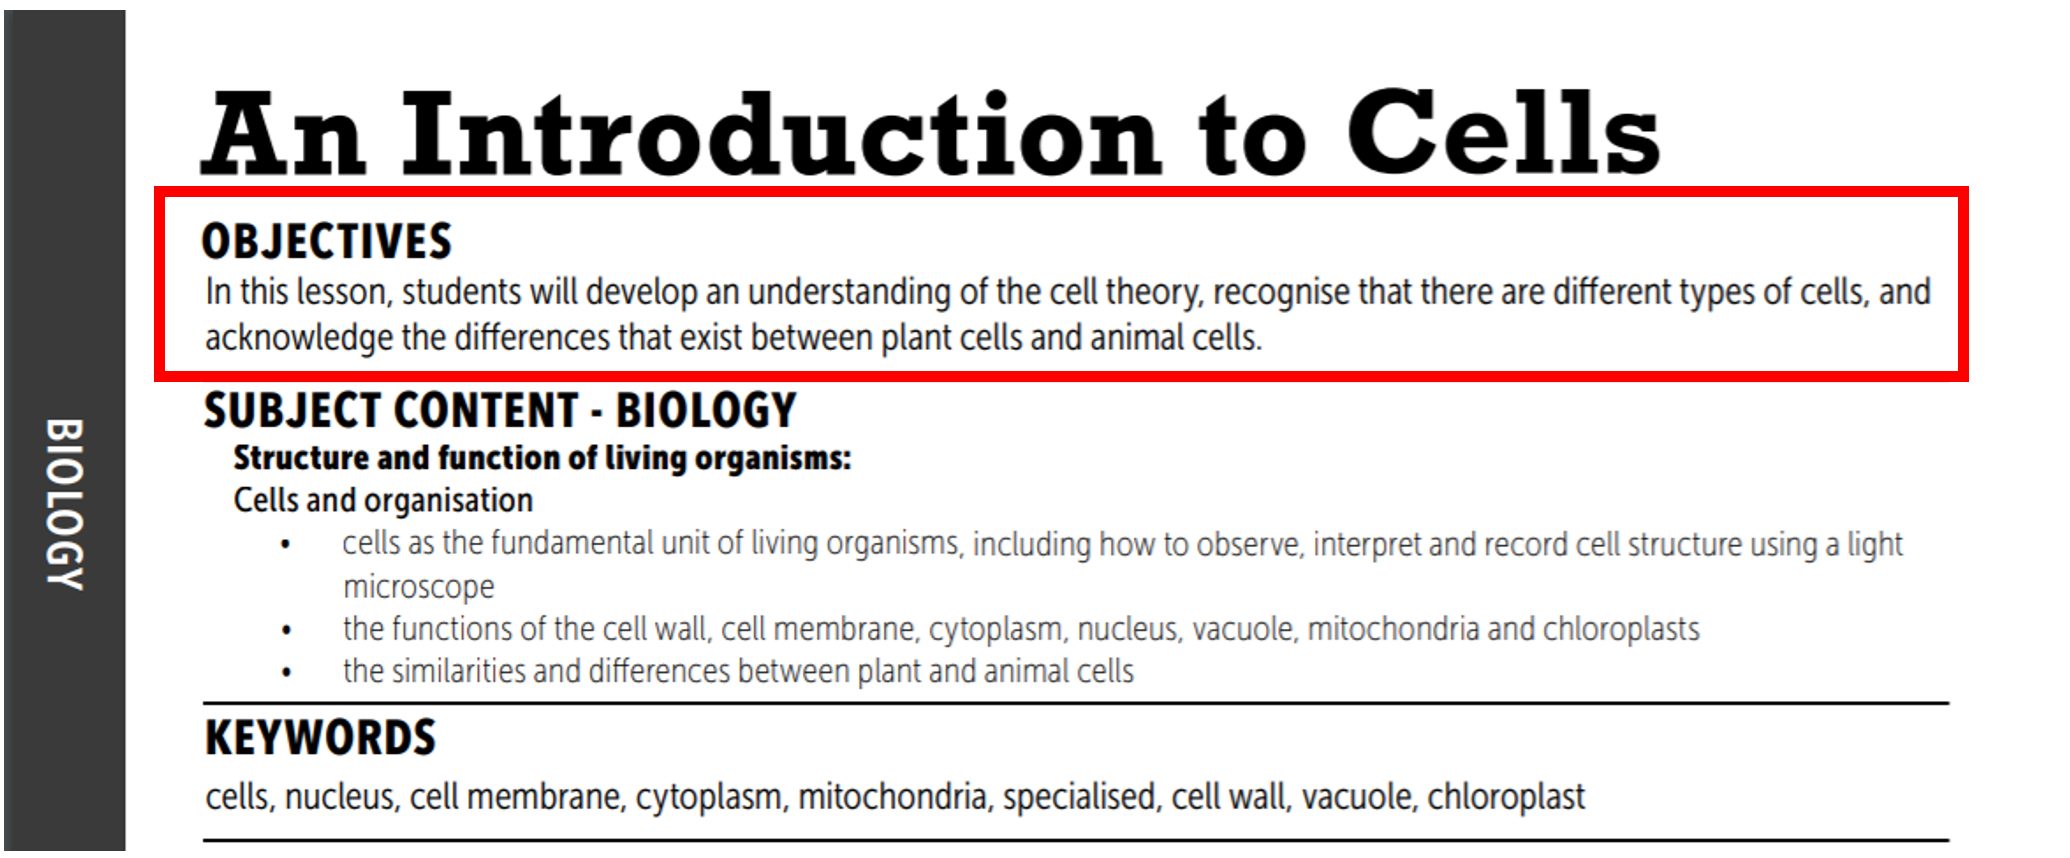
The unit of work is on cells in Biological Sciences. The first step is to learn about cell theory and different types of cells. By the end of the unit, students will be assessed on their attained knowledge of organelles by creating haikus about their functions and characteristics.
2. Meeting Standards
You will be required to teach to the National Curriculum, and your students will be taking standardised tests (e.g., GCSEs) throughout their school career. Standards identify appropriate academic outcomes for each stage of their learning.
It is only beneficial to demonstrate how you have linked your lesson plans to syllabus outcomes during meetings with your headteacher or principal. This is evidence of your professional practice and the appropriateness of the lessons you have been teaching.
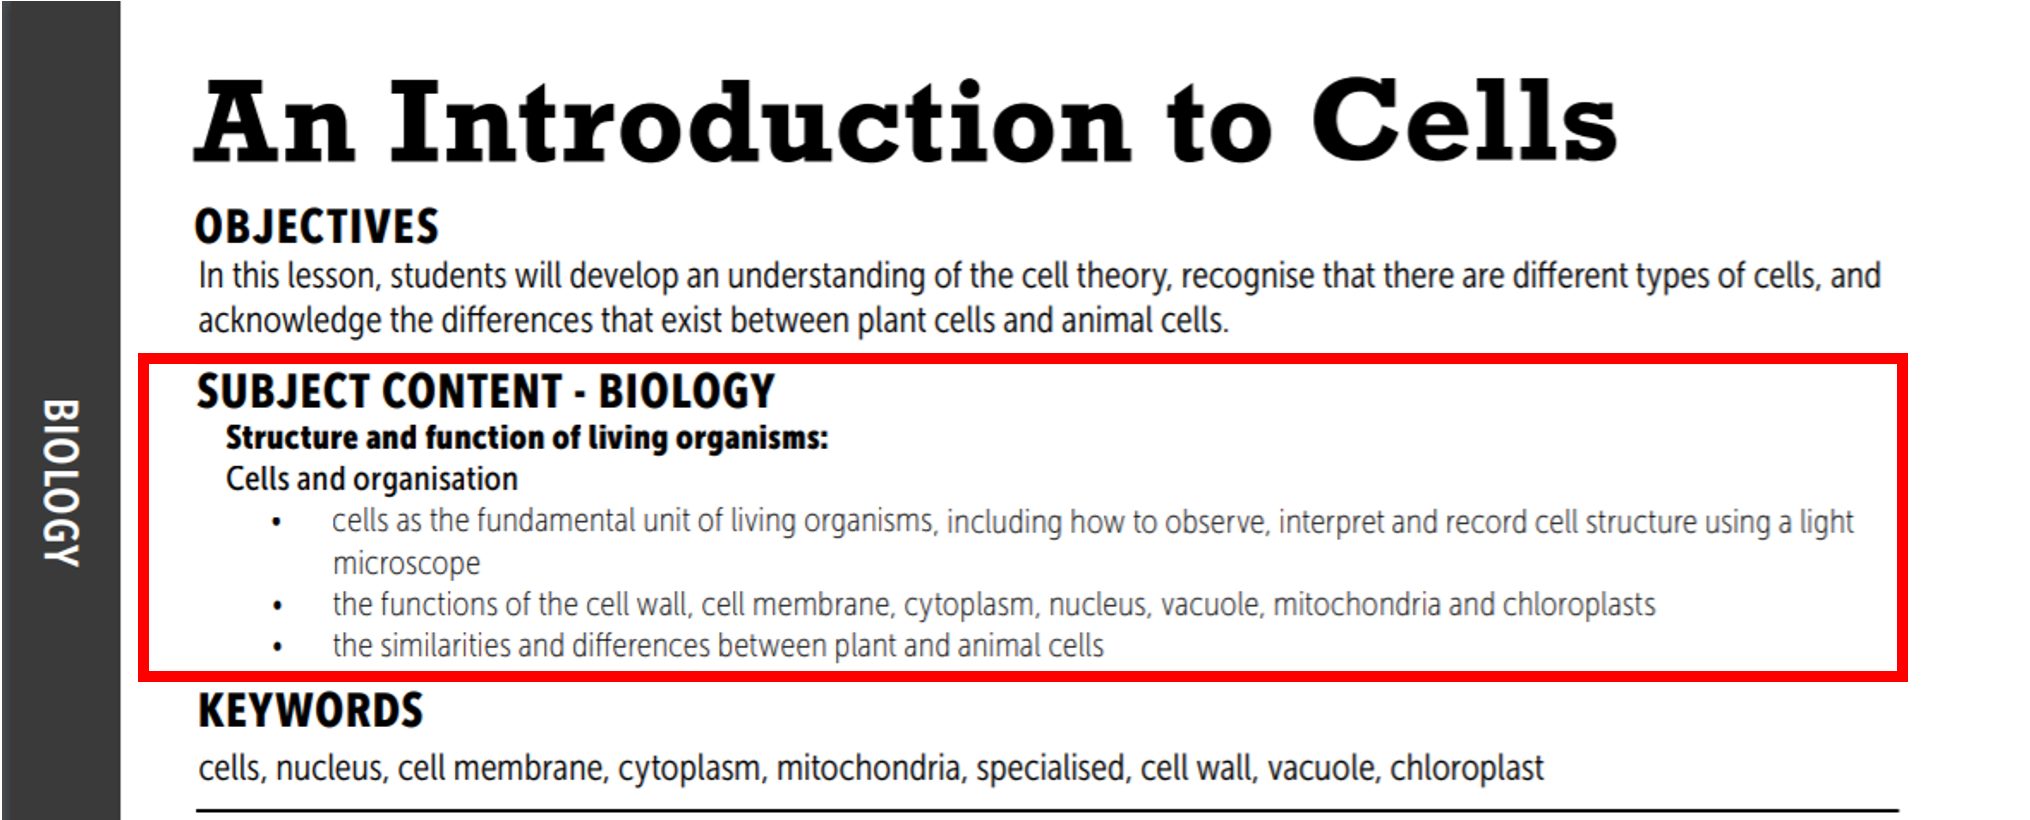
Using the same example as before, you can see how ClickView maps every lesson to appropriate syllabus and curriculum outcomes. This ensures that the content you use in the classroom gives your students the knowledge and skills to succeed throughout their school life.
3. Learning Activities
The next stage in lesson planning is to decide on a series of activities to introduce new ideas and allow your students to practice and experiment with what they are learning. Some of your classes will be able to sustain their focus over a period with only two or three activities. Other classes may require you to use a wider variety of activities to keep their engagement and motivation.
It is also important to consider:
- How much preparation an activity will require
- How easy it will be to implement it in the classroom
- How long it should (ideally) take your students to complete.
From page 3 of “Shakespeare: Lesson Plans for the ClickView Curriculum Library,” A Midsummer Night’s Dream – ‘Context and Background’ lesson, you can see an example of the lesson’s learning activities detailed in sequential order.
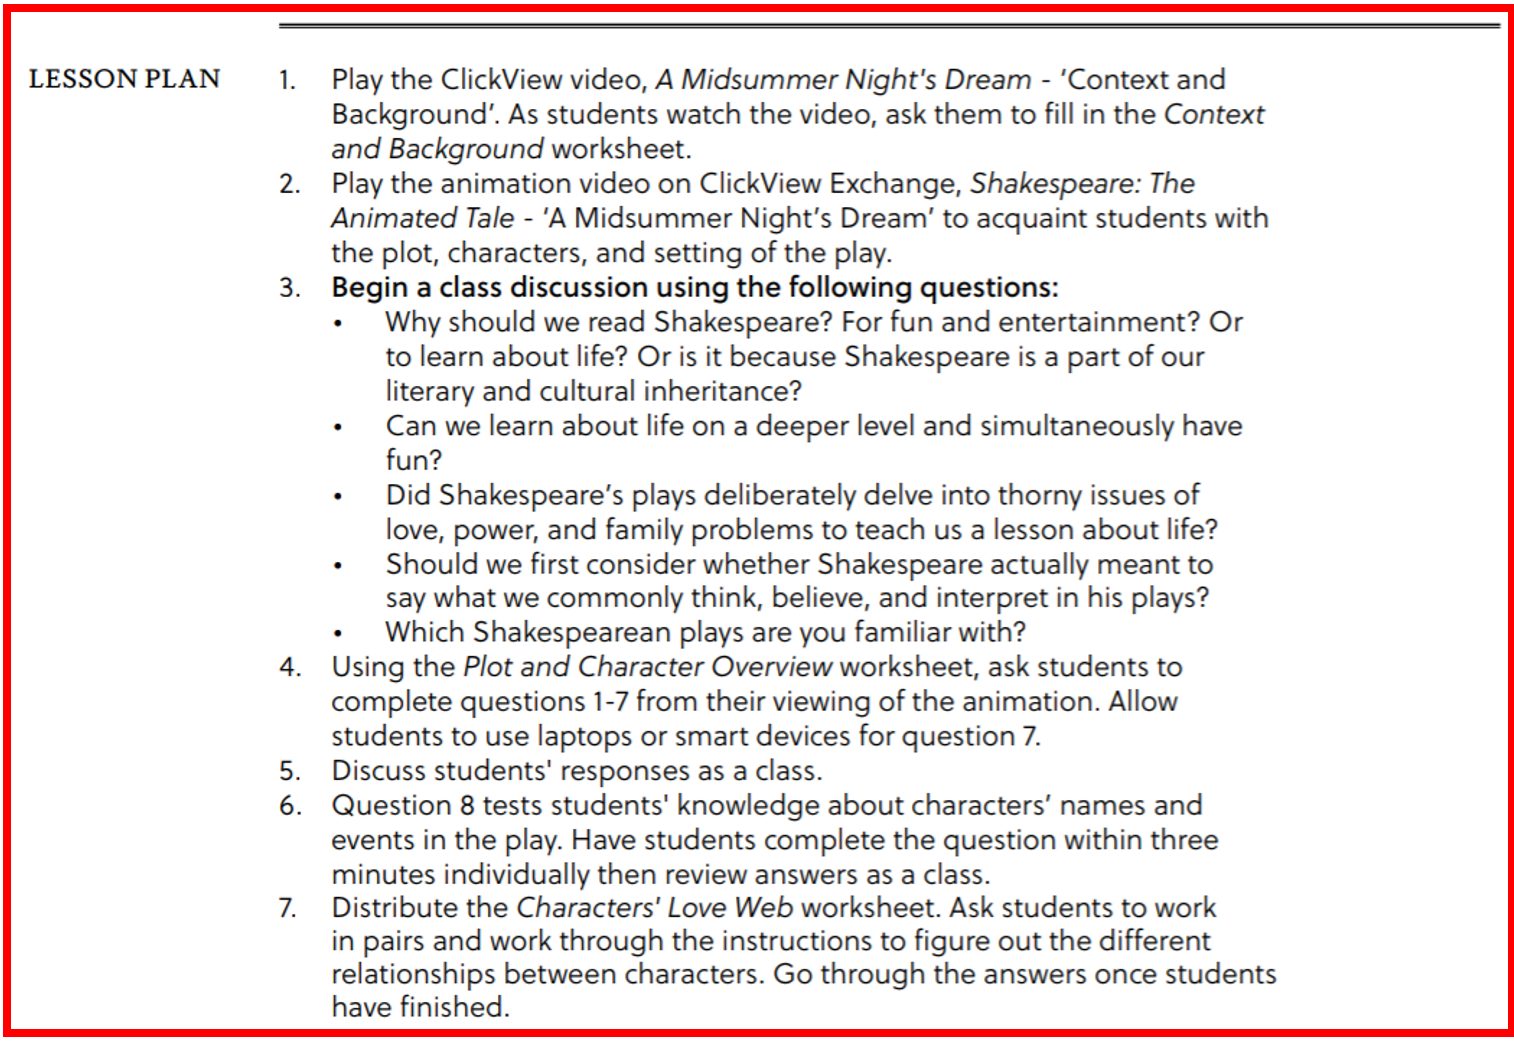
You can use as much or as little detail of activities as you like, but if you have any intention to reuse your plans in the future, you should try to make sure that it is suitably detailed. Although this can be time-consuming, you can see from the above example that any teacher could pick up this lesson plan and run the lesson without any confusion.
4. Resources
The availability of resources from school to school is going to vary greatly. Teachers at Bourke High School will face different challenges when designing their lessons compared to teachers at Melbourne High School.
Resources to take stock of include:
- What is on offer at your school
- What your colleagues and predecessors have made
- What your students can bring to class
- Online, video and computer resources
- How the community can help
- What resources you can make for teaching (also consider the cost incurred by you)
Select the resources you will need to facilitate your learning activities and have them ready before class.
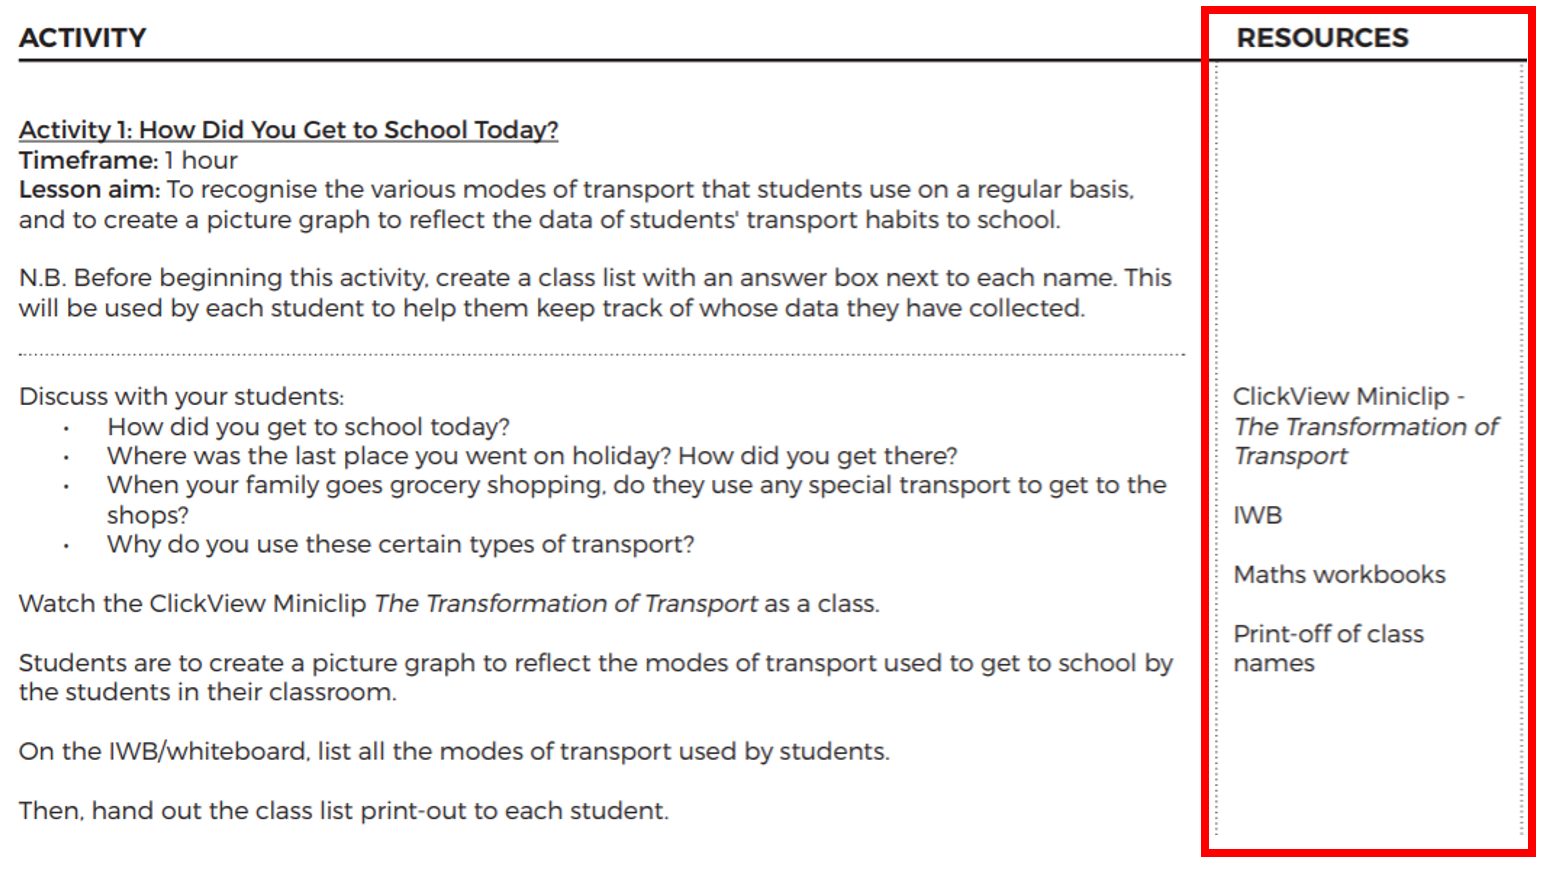 This example is from page 4 of the “The Transformation of Transport” Teacher’s Pack for Key Stage 2: Design and Technology lesson. In this example, the “The transformation of Transport” Miniclip and IWB would be set up in the classroom, the teacher supplies the print-off class names, and students would use their Maths workbooks.
It is always a good idea to carry spare pencils and writing paper in case they do not have any. You could also collect students’ books at the end of the lesson if your class is not great at bringing their equipment. Have any online resources, video and audio equipment cued up and ready to go before class; you should have a plan B for when technology fails (unfortunately, most of us find this out the hard way).
5. Differentiation
Because no two students in your class will be exactly alike, it stands to reason that their learning styles, motivations, strengths, and weaknesses will be different. As such, a one-size-fits-all approach sets some students up to fail before your class begins. It is essential to accommodate your diverse learners’ different learning styles when you design your lessons.
This could include:
- Use of individual, pair, small-group and whole-class activities
- Presenting instructions in a variety of ways
- Allow activities to be completed in different ways
- Plan varied activities (reading, writing, listening, visual, speaking)
- Allow devices when possible
- Use a variety of assessment
- Provide feedback in different forms
- Allow students to give feedback on their learning
In our Key Stage 2 Cyber Safety: Understanding Malware lesson plan, you can see how you can easily facilitate differentiation by your choice and sequence of activities.
- The use of small groups in the brainstorming warm-up allows the teacher to assess background knowledge in a non-confrontational, peer-supported manner.
- The activity allows students to communicate ideas orally, visually and in written format and negotiate roles to suit their learning styles for the class presentation.
- The video presentation is visually captivating and conveys straightforward information about types of Malware in a short, digestible clip.
- The next activity allows groups to reassess and build on their knowledge by allowing each student to convey their ideas on what they picked up from the video in their original group.
- Finally, the class is divided into three groups that rotate through varied activities while sharing their combined ideas from smaller groups to consolidate a deeper understanding of the topic.
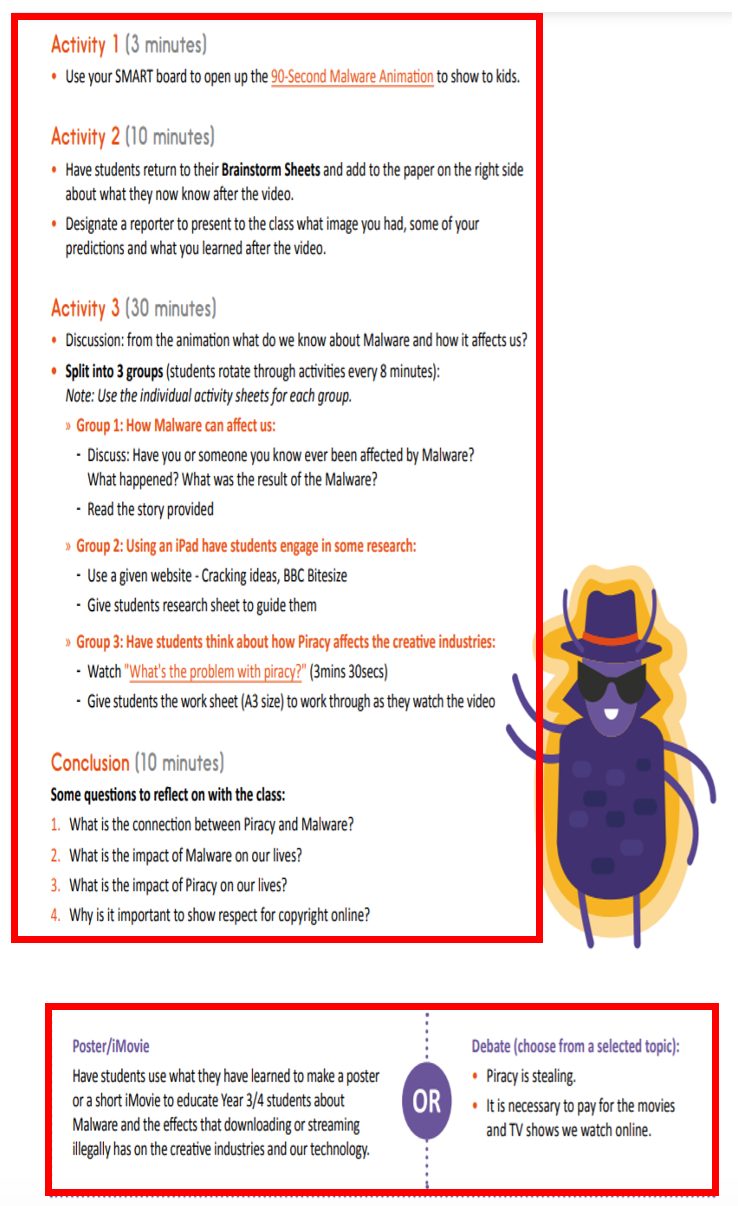
The assessment item allows students to choose between designing a poster (suitable for students who prefer visual and written learning styles) or a debate (ideal for students who prefer to demonstrate what they have learnt verbally).
6. Assessment
The final consideration you should make when designing lessons plans is incorporating assessment. You should look to include a form of assessment in your lesson plan to gauge your students’ developing skills and understanding as they work through class activities. This will allow you to identify any gaps in student knowledge, skills that need further development and activities that are working or not working.
Formative assessment refers to your ongoing assessment over a unit of work and includes:
- Quizzes
- Questioning
- Feedback
- Teacher observation
- Class discussions
- Written questions and answers
- Homework
- Student demonstration
- Interactive video responses (create your own)
- Reflection
Formulating questions before the lesson will help you quickly target the information you’re after and direct class discussions with better structure.
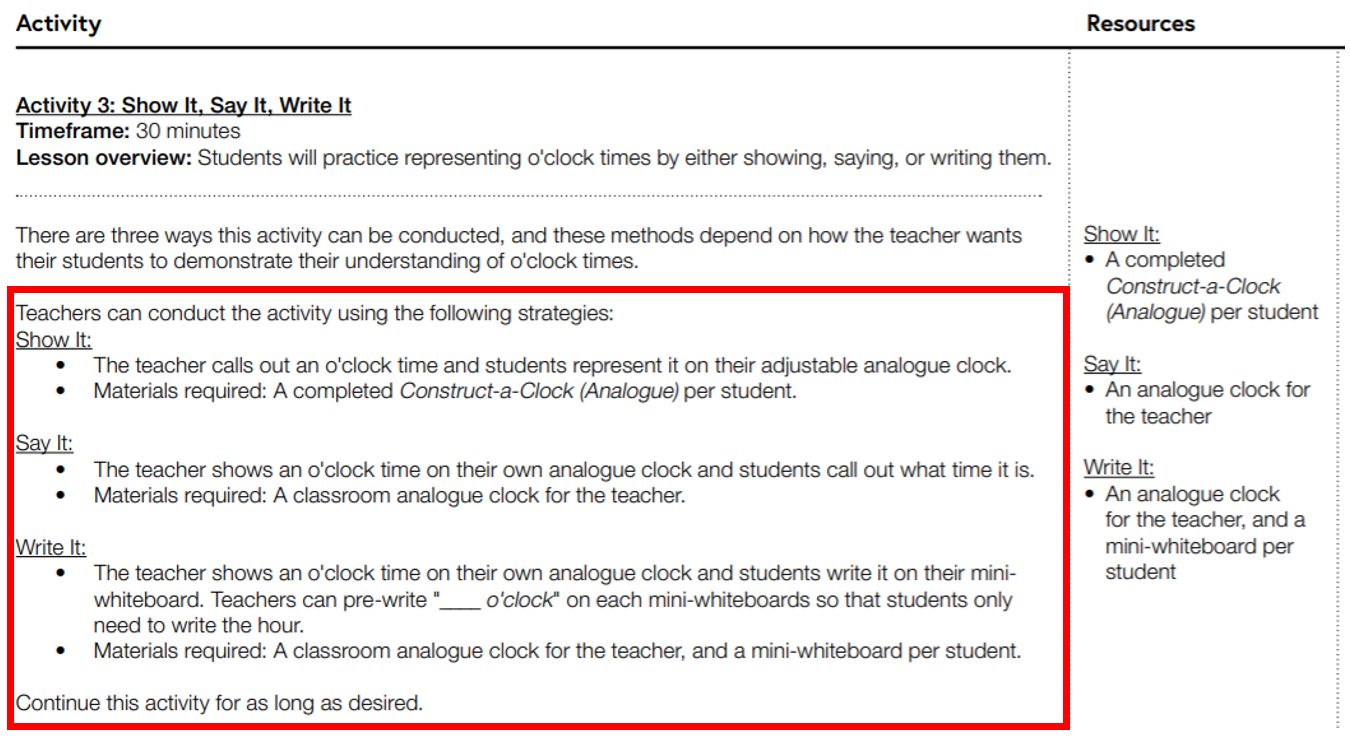 From page 5 of our Key Stage 1 (Year 1): Mathematics, “Analogue Clocks: Telling Time to O’Clock,” you can see differentiated activities that will give the teacher comprehensive feedback on their students’ grasp of telling the time and where there is need for more instruction.
For further tips on incorporating academically enriching and engaging video content into your lesson plans, visit our Training Page. You will find extensive lesson plans and teaching resources to help you start lesson planning more effectively.


Hello, I’ve recently passed the written test of the Italian national competition for teachers. In the next weeks I will let you know the calendar of the final test. It consists of a lesson plan presentation. I’m looking for original and creative teaching ideas that can help me in class